How to Migrate from google workspace email to Microsoft 365 email account, Step by Step guide.

Here you will be guided step by step on how to migrate from google workspace email to Microsoft 365 email account in a very easy to understand manner.
Many of us are still using G suite legacy free edition who have registered before December 2012. As per the latest announcement from Google, now this free service is going to stop from 1st May 2022. Users will have to either purchase an appropriate subscription or will have to migrate their data to another platform like Microsoft 365.
So let’s walk through this migration process.
Step 1 – the creation of a Microsoft 365 account
Create your Microsoft 365 account at https://www.microsoft.com/microsoft-365
Step 2 – login to the admin panel of Microsoft 365 once your account is created
login to it at admin.microsoft.com
Step 3 – Configure a domain name in Microsoft 365
here we are not going into how to register a domain name as we assume you have a registered domain with you.
here, for example, we are using the domain name yourdomain.com
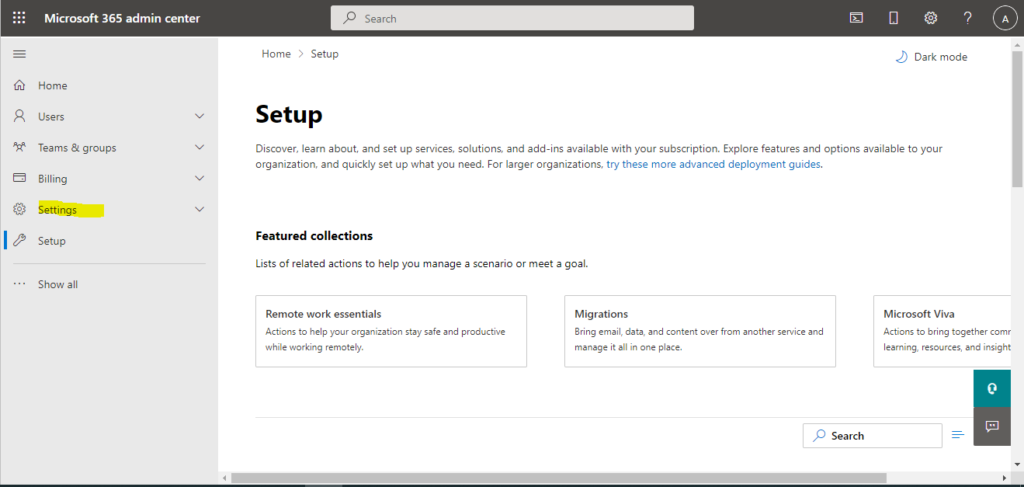
Step 3.1 – click on the settings
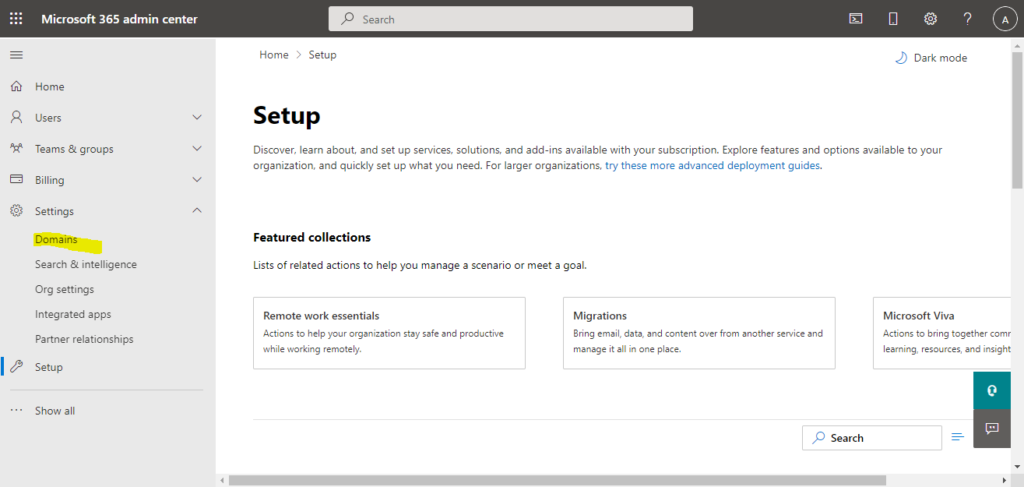
Step 3.2 – click on the Domains
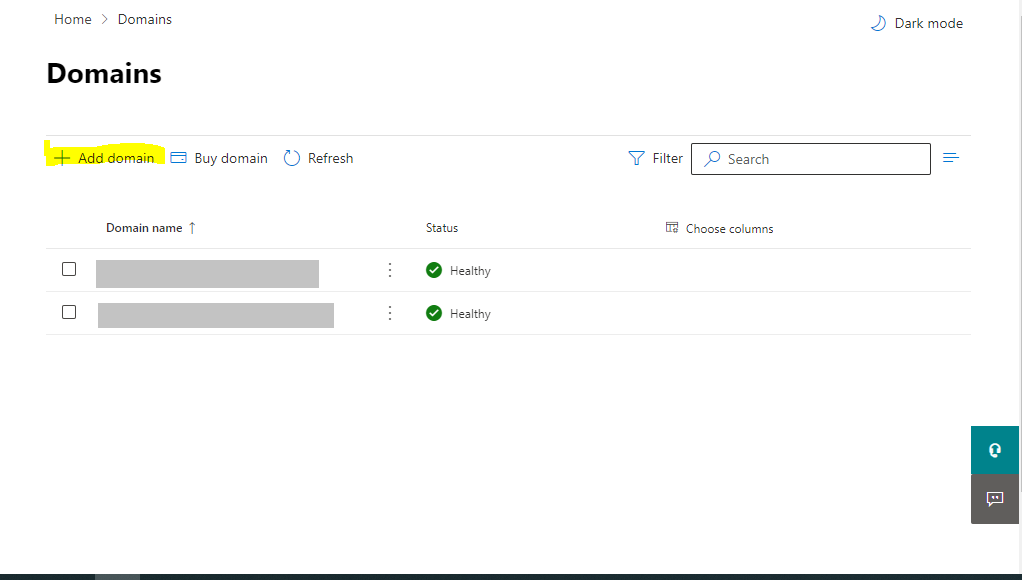
Step 3.3 – Click on Add Domain
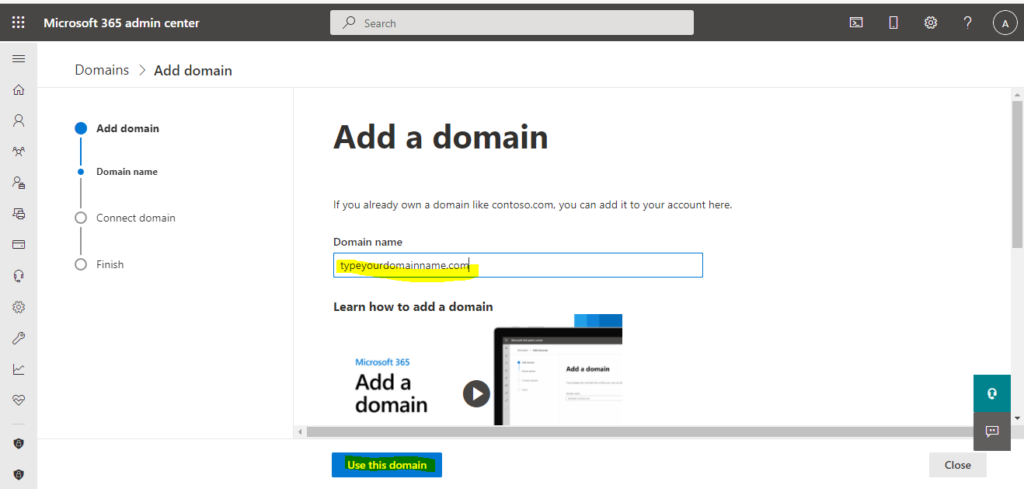
step 3.4 – Type your domain name & click on use this domain button
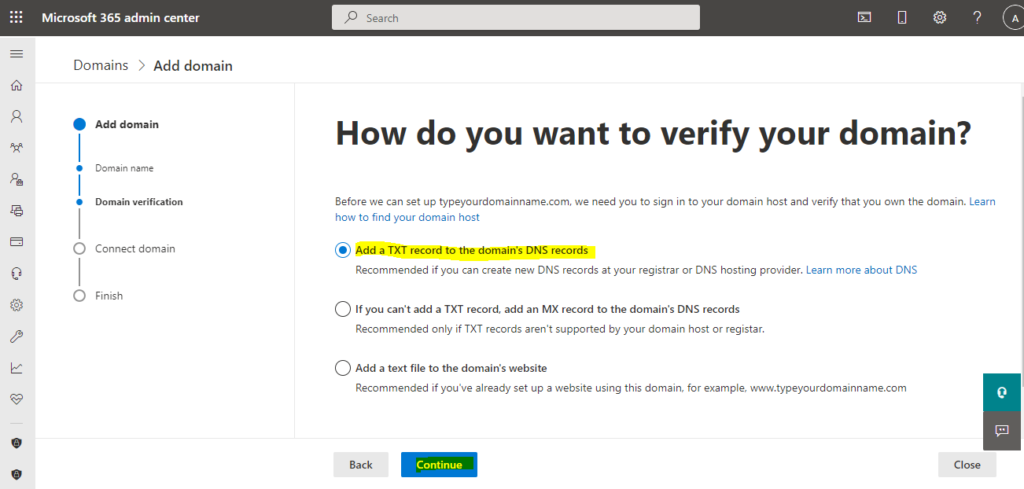
Step 3.5 – Verify domain ownership. select the appropriate method to verify from the list. here we are selecting “add a TXT record to the domain’s DNS records”. and click on continue.
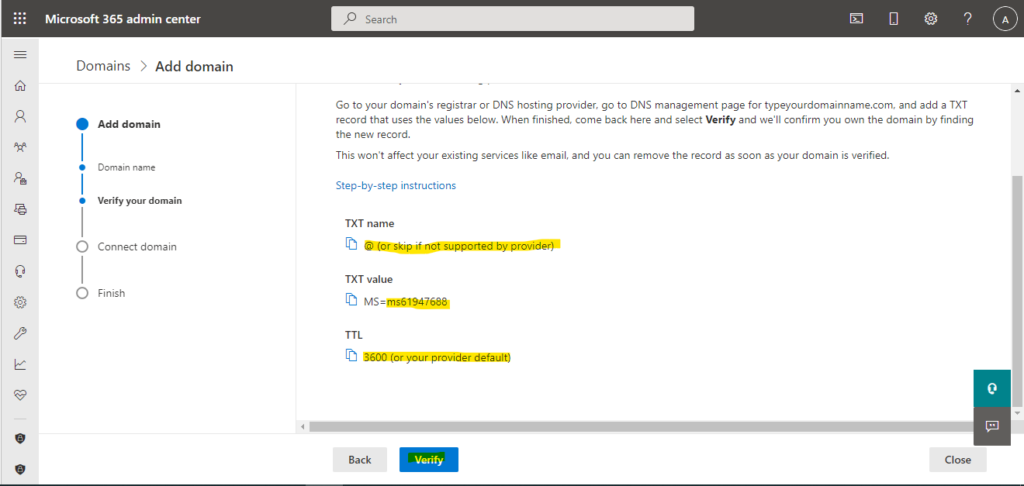
Step 3.6 – Create a TXT record for your domain from your domain’s control panel. TXT record should be created as per the value mentioned on your screen as per the following screen capture. once you successfully create a TXT record for your domain, click on verify button.
Step -4 configure DNS records
Once the domain is added, you will be prompted to configure DNS records of your domain like MX record, SPF TXT record and Autodiscover CNAME. follow the steps as per the wizard shown you on your screen.
note: all these three records are configured in your domain’s control panel, not in Microsoft 365 admin panel.
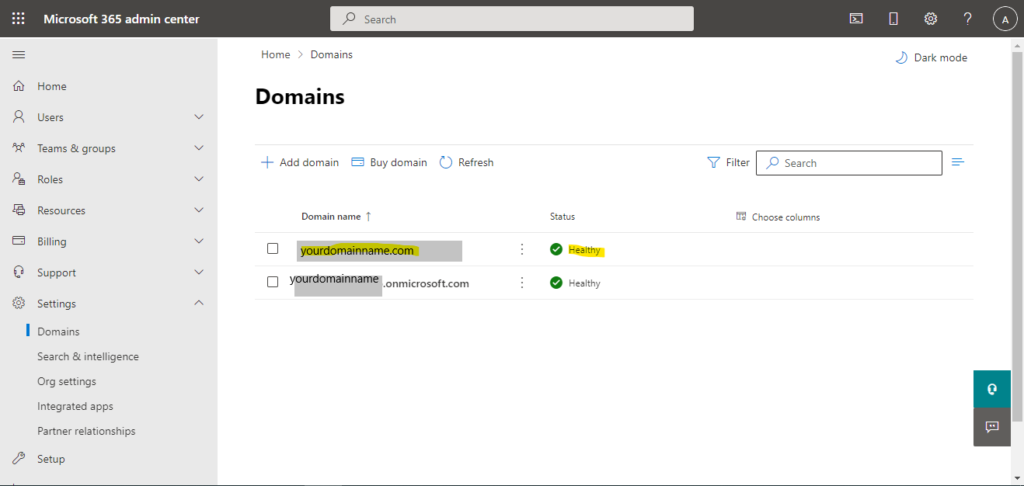
once the above DNS is configured, you can check the status on the domain’s dashboard at admin center > settings > domains. domain’s status should be Healthy.
Step – 5 create a user in Microsoft 365
go to Admin Center > Users > Active Users.
Click on “Add a user” fill in the required details and create a user.
Note: license assignment is a must for your created user. ideally, the user name is the same as you have in google workspace (Gsuite), but if you wish you can create with another name also.
after finishing the above steps, you should be successfully sent and receive an email from Microsoft 365 (outlook) from your new user ID and your google workspace account should be stoped receiving & sending new emails.
Now you are ready with all prerequisites to transfer your email account from Google workspace (Gsuite or Gmail) to Microsoft 365 outlook account.
Now we are starting to migrate from google workspace email to microsoft 365 email account.
Step – 6 create CSV list of google accounts to migrate to Microsoft 365 (office 365) email.
create an excel file as per the following template.

Column A = the email address of the Microsoft 365 or Office 365 mailbox. This is what’s shown in the username column in Users > Active users in the Microsoft 365 admin center. (for example, user@yourdomain.com)
Column B = is the sign-in name for the user’s Gmail mailbox (for example, user@yourdomain.com).
Column C = is the password for the user’s Gmail mailbox.
Note: if your Google and Microsoft username & domain are the same, then columns A and B will have the same value. make sure your Gmail username and password are correct and working. please crosscheck it by trying it once at google login before adding it into the above said CSV file.
not to mention, above said template should be saved as CSV in excel.
Step – 7 set ready google accounts for migration.
Step – 7.1 login to your google admin with your admin account at admin.google.com
Step – 7.2 go to Security > Less Secure apps and select “allow users to manage their access to less secure apps”, and then “save” this setting.

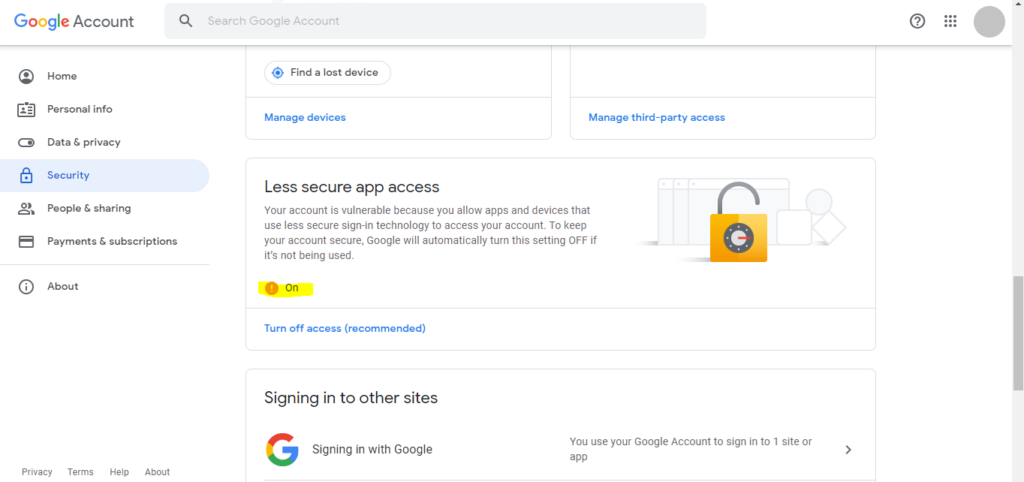
Step – 7.3 Please note that this step should be performed for each google account that is in the migration list. go to myaccount.google.com and log in with your user account (which is to be migrated).
Then go to Security, Click on “Less secure app access”. (it will prompt for reauthenticate your user)
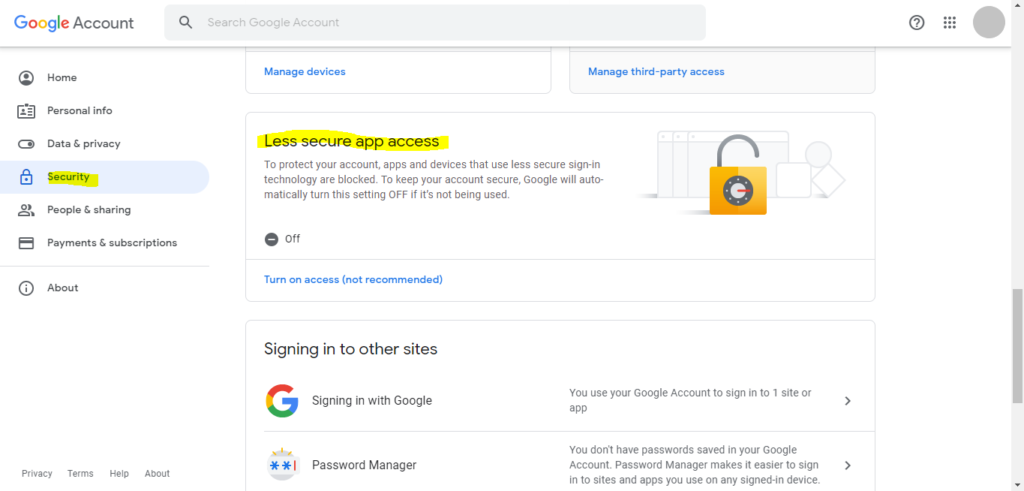
After authentication, you will be reached to the “Less secure app access” page. here you will have to enable the setting by clicking the radio button. The radio button colour will change to blue if it is enabled, otherwise, it will show in black/grey if it is disabled.
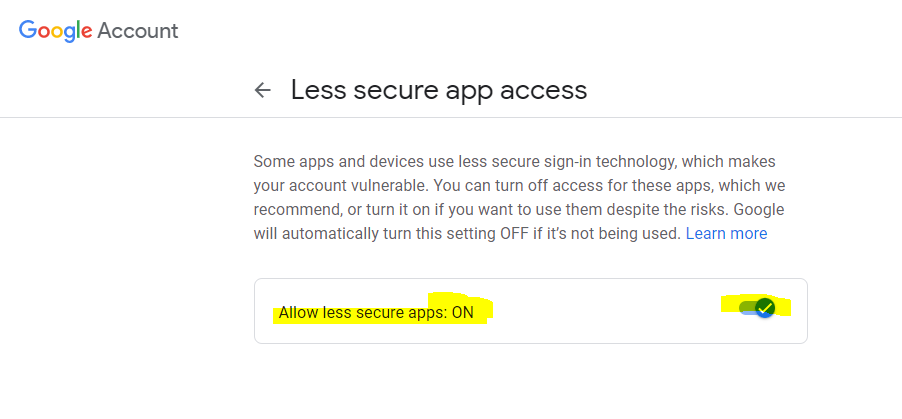
once “Less secure app access” is enabled, it will look like as following screen capture in your account’s settings tab.
after verifying above said settings in your google account, log out from your google account.
step – 8 Create endpoint connection in Microsoft 365
Now come back to the admin panel of Microsoft 365.
From here open exchange admin center and from there open the classic exchange admin center.
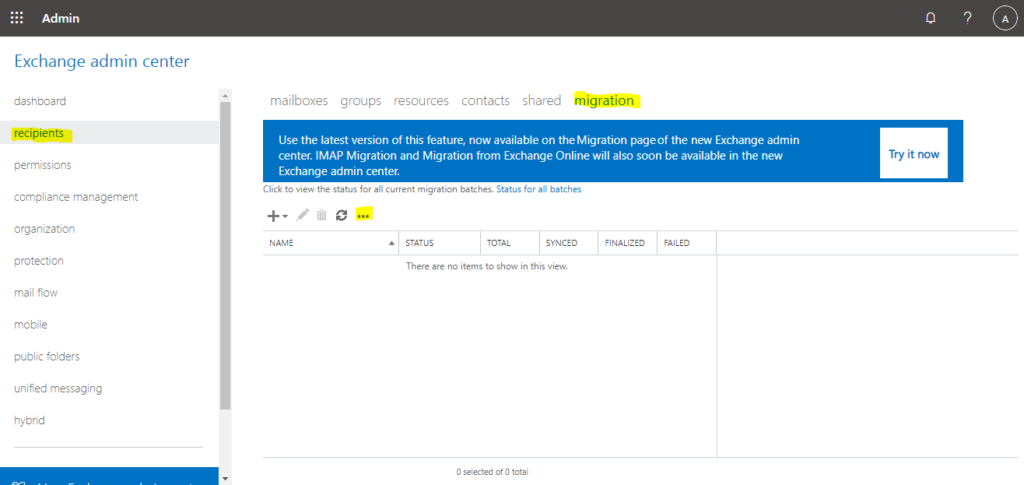
Here goto recipients > migration
Click on the three dots icon (More) and select migration endpoints.
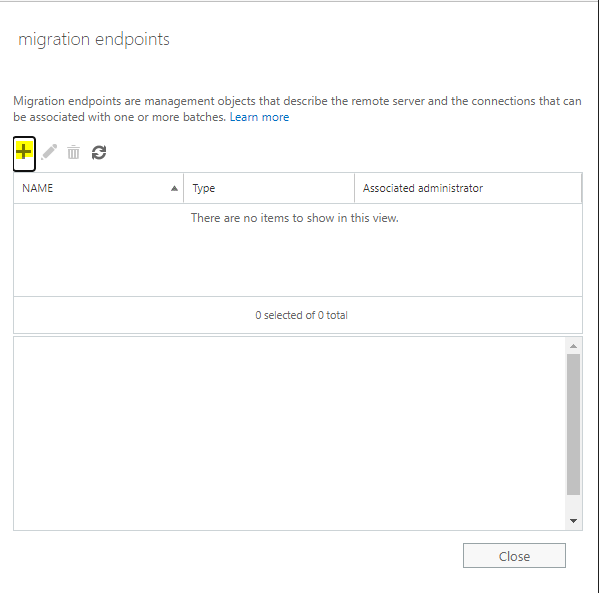
A new migration endpoints window will pop up. here click on the new button(+ sign button).
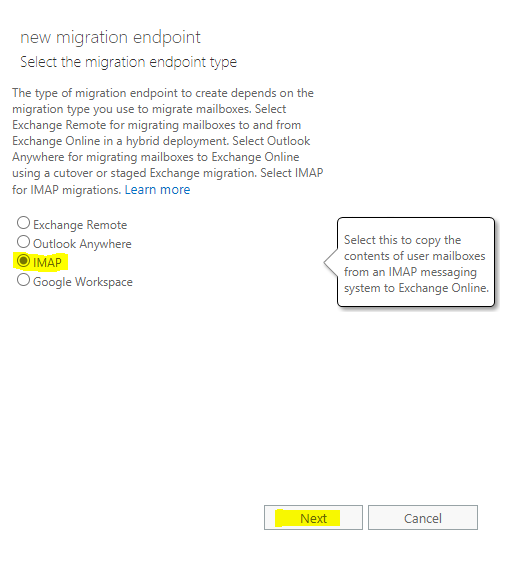
When you will click on the New button, you will get another pop-up window, where you will have to select migration endpoint type. Here select “IMAP” and click on the Next button.
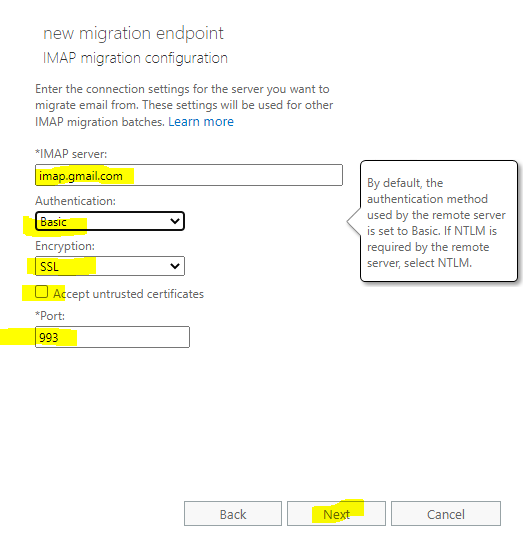
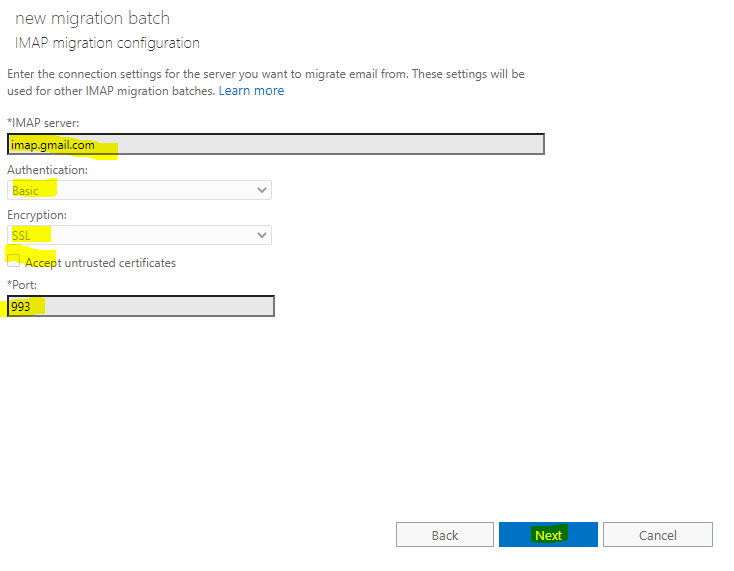
Next, it will ask for IMAP server settings. Type imap.gmail.com in IMAP server name field and leave the default value for other fields. do not make any changes in those fields. it should look like the following picture. and then click on the Next button.
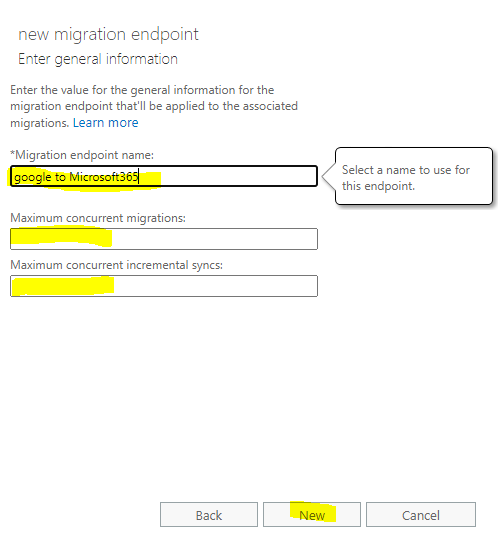
Now, it will ask to give a name to this connection here we have given the name “google to Microsoft365”. and leave blank other fields as it is and click on the New button. Please refer to the following picture.
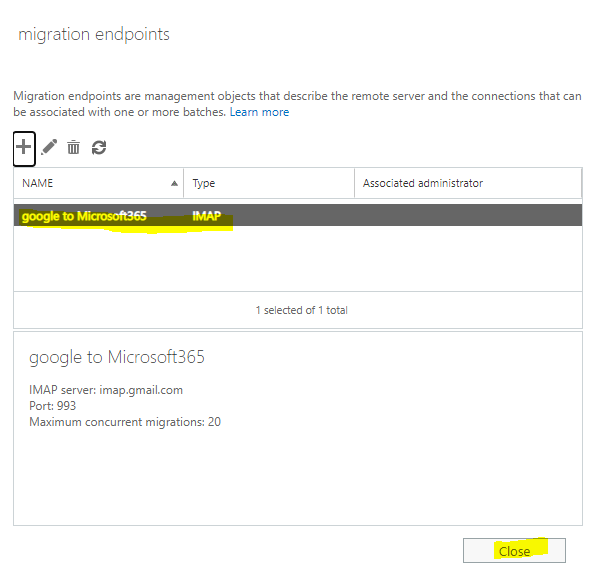
you should get a “saving completed successfully” message. click ok to this message, and the wizard window will be closed. now check the “migration endpoints” popup window. it should show a newly created endpoint connection in the list as shown in the following picture. close this pop-up window by clicking on the Close button.
Step – 9 Create a migration batch and start migrating google workspace(Gmail) mailboxes in Microsoft 365.
Now come back to Exchange admin center (classic) and go to Recipents > Migration >
Click on + sign and select “Migrate to Exchange online” from popup menu.

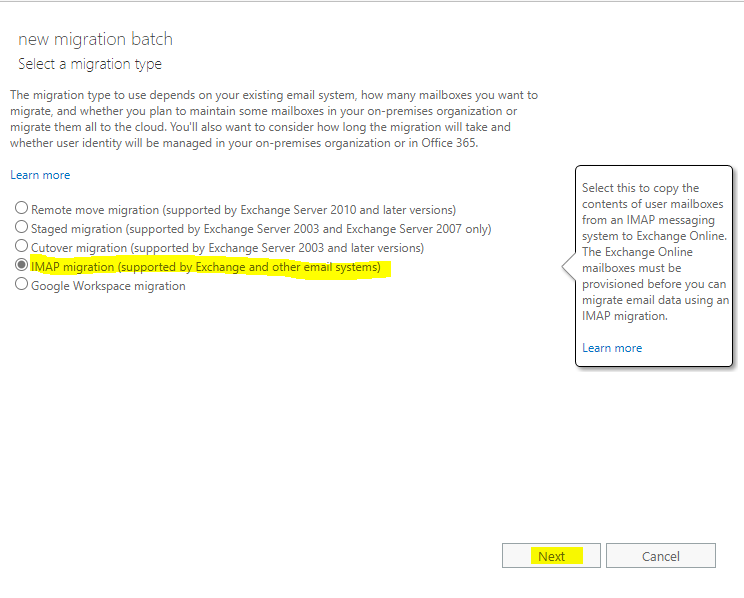
you will get a new popup window “new migration batch”
here select a migration type “IMAP Migration (supported by exchange and other email systems)“, and then click on the Next button.
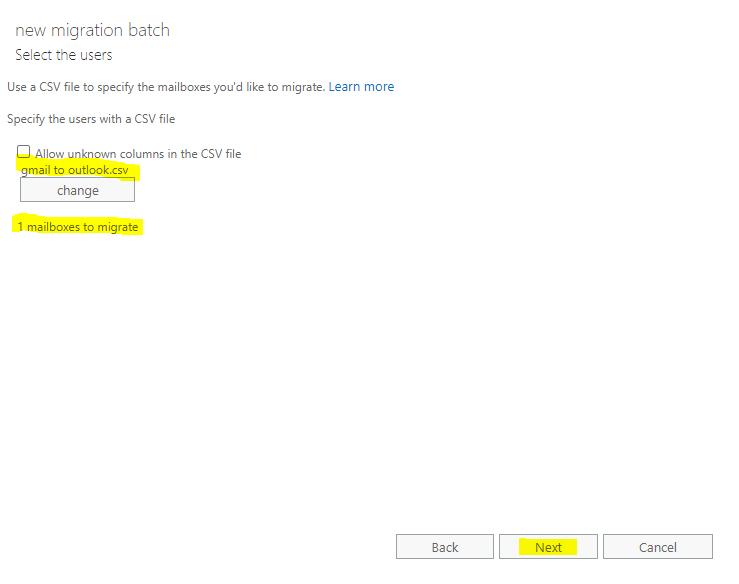
Now it’s time to select users. Click on the choose file button and select the CSV file which you have created in above demonstrated step-6.
Once you select the file, the selected file name will be shown above the change button and below it will show the count of mailboxes listed in the selected CSV file. Then click on the Next button.
Now in the next window, select the connection endpoint. if you have only one connection endpoint, it will not let you choose and will automatically get details of the only connection endpoint. and if there are multiple connection endpoints then select the one which you have created in above step-8. like in this guide we have named it “Google to microsoft365”, so it should be selected. and then click on the Next button.
right now we don’t have any other connection endpoints created in our admin, hence it is showing as the following picture.
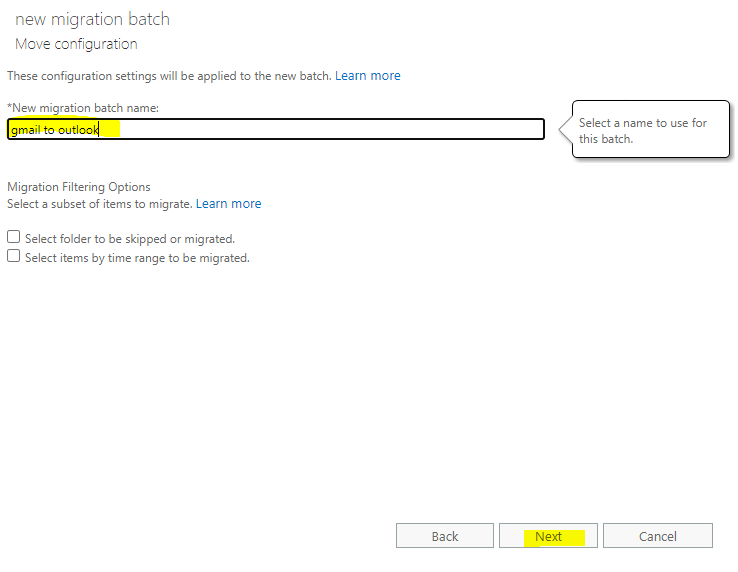
in the next window, give a name to this batch configuration for example “Gmail to outlook” and click on the Next button.
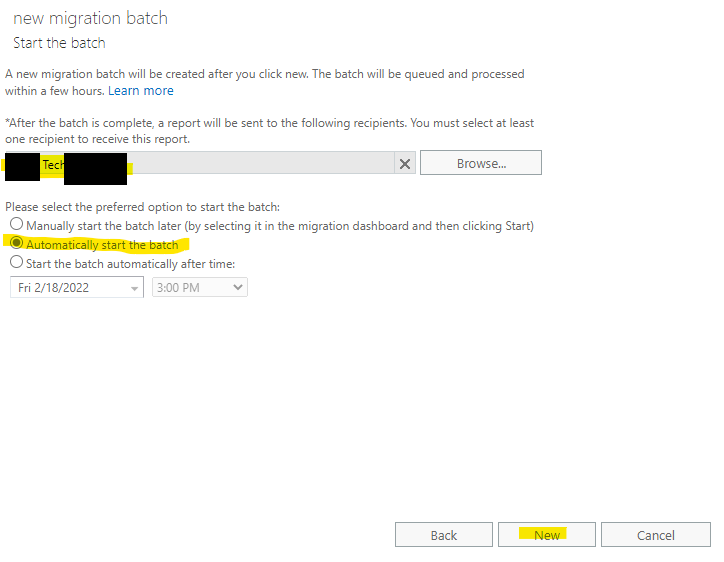
Now in the next window, select one recipient address by clicking on the browse button, where you should get the batch process detail report once the process is finished. (Microsoft 365 mail account)
And then select the preferred option to start the batch. generally, it should be “automatically start the batch”, but you can select as per your convenience. and then click on the New Button.
this will create a new batch as per your selected options and once it is created, you will get a confirmation message. Click on the OK button. this will close the popup window.
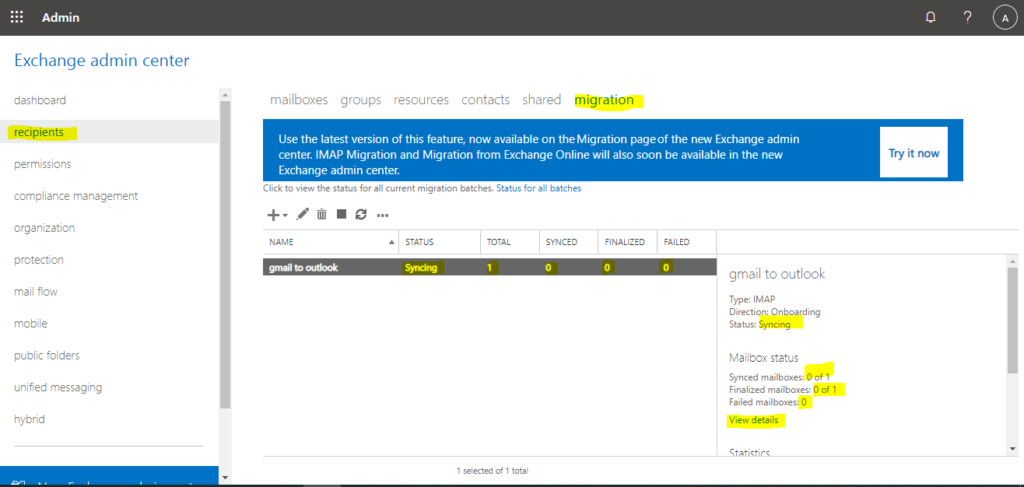
now come to Exchange admin center (classic) > recipients > migration.
here you will see the batch status which you have created.
in the status column, when the sync process starts, it will show as syncing, until the process is not completed. if it is completed successfully, the status will be changed to synced or fail if it encounters an error. This will take time depending on the number of mailboxes in your list and data in each mailbox. it may be a few minutes, hrs or days. so don’t be impatient in a few minutes and wait for the report in your selected email id or keep checking this dashboard after certain intervals.
Once the status column shows as “synced”. it means you have migrate from google workspace email to microsoft 365 email account. The process is ompleted. then check the email ids which was in the CSV list. it should show with all emails and folders which was in your google workspace Gmail mailbox.
After around 72hrs of “synced” status, delete the created batch from Exchange admin center (classic) > recipients > migration. otherwise, it will keep resync with your Gmail account which is not required.
Please let us know, where these steps are helpful to succeed you in migrating your google workspace email to Microsoft 365? please share your feedback in below comment section.